¶ Documentation: Views in Planning
¶ Overview
This documentation provides instructions for creating, managing, and utilizing views in the Planning application. Views allow you to create virtual tables based on the result set of SQL statements, providing flexible data access and manipulation capabilities.
¶ Prerequisites
- Access to Planning application
- Appropriate permissions to create views.
¶ Step 1: Access View Creation
Navigate to the View section in Planning to create a new view.
¶ Step 2: Click "Create New" Button
Click on the "Create New" button to open the view creation modal.
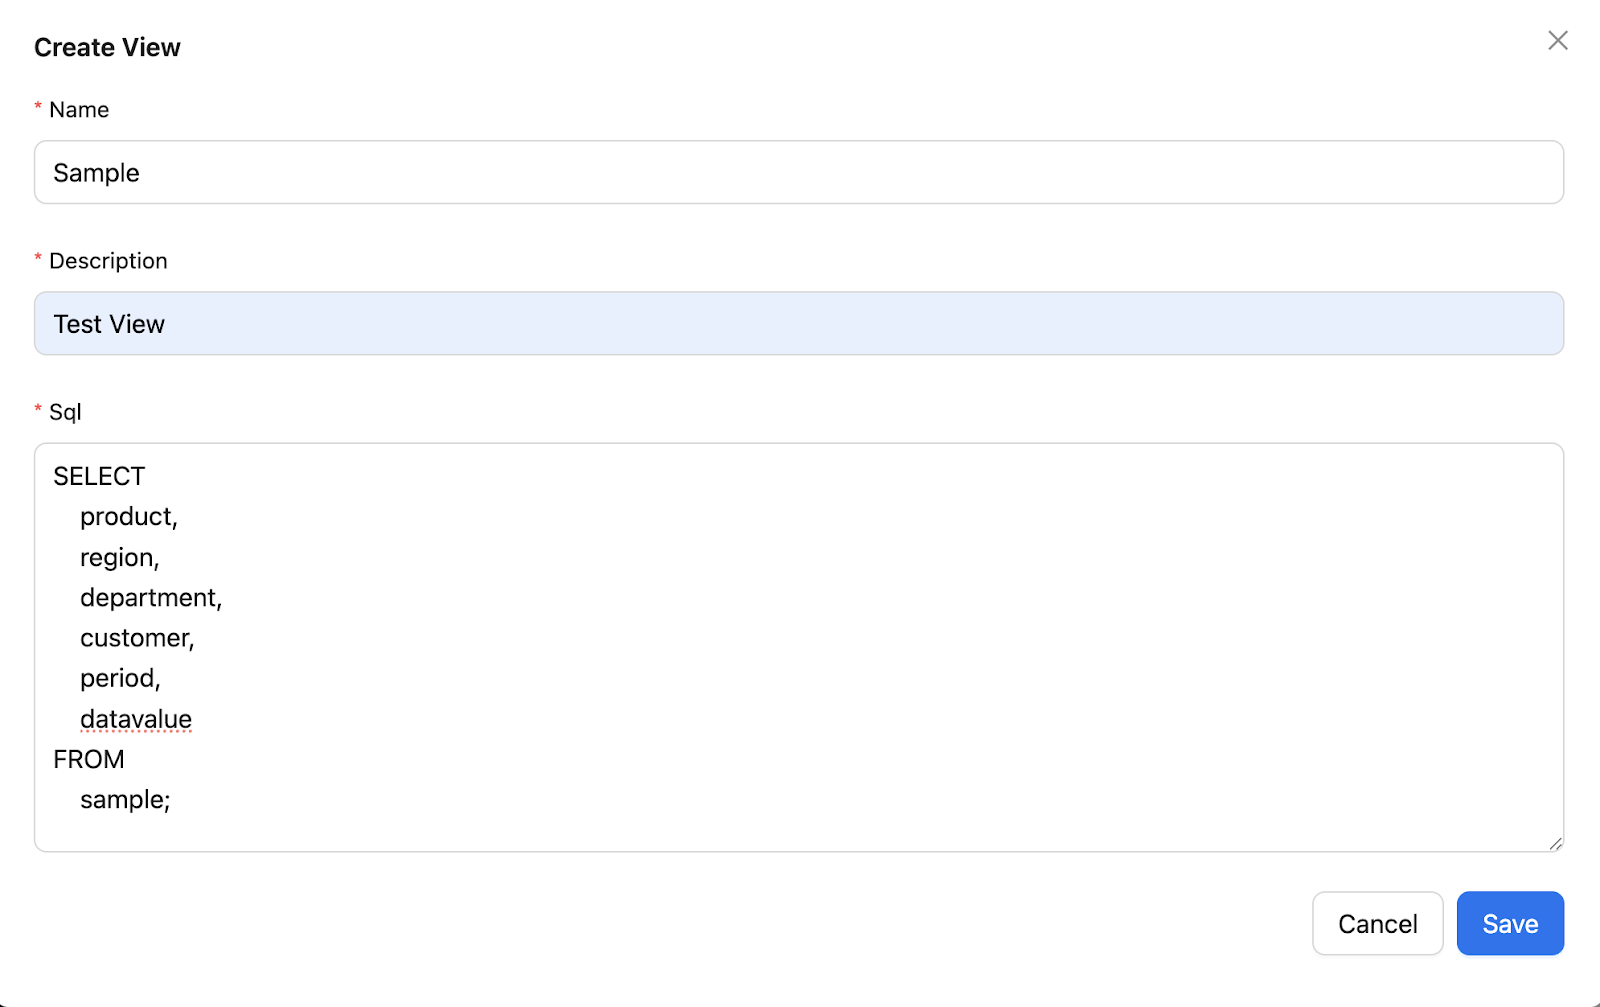
¶ Step 3: Complete the View Creation Form
The modal contains three required fields:
- Name: Enter a descriptive name for your view
- Description: Provide a brief description explaining the purpose of the view
- SQL: Enter the SQL query that defines your view
¶ Step 4: Save the View
After completing all required fields, click the save button to create your view.
¶ Documentation: Creating Views in Planning
¶ Overview
This documentation provides instructions for creating, managing, and utilizing views in the Planning application. Views allow you to create virtual tables based on the result set of SQL statements, providing flexible data access and manipulation capabilities.
¶ Prerequisites
- Access to Planning application
- Appropriate permissions to create and manage views
¶ Creating a View
¶ Step 1: Access View Creation
Navigate to the View section in Planning to create a new view.
¶ Step 2: Click "Create New" Button
Click on the "Create New" button to open the view creation modal.
¶ Step 3: Complete the View Creation Form
The modal contains three required fields:
- Name: Enter a descriptive name for your view
- Description: Provide a brief description explaining the purpose of the view
- SQL: Enter the SQL query that defines your view
¶ Step 4: Save the View
After completing all required fields, click the save button to create your view.
¶ Managing Views
¶ Editing Views
- Navigate to the Views section in Planning
- Locate the view you wish to edit in the list
- Click on the edit icon in the action column
- In edit mode, you can:
- Modify the description to update the view's documentation
- Edit the SQL query to change the view's structure or data selection
- After making your changes, save the updated view
¶ Deleting Views
- Navigate to the Views section
- Find the view you want to remove
- Click on the delete icon in the action column
- Confirm the deletion when prompted
- Note: Deleting a view will not affect the underlying tables
- Any reports or forms using this view as a data source will be affected
¶ Using Views in Reports and Forms
¶ Integrating Views as Data Sources
- Navigate to the Report/Form Builder section
- Create a new report or form, or edit an existing one
- In the data source configuration section:
- Select "View" as the data source type
- Choose the desired view from the dropdown list
- The system will load the schema of your selected view
- You can now:
- Select columns to include in your report/form
- Apply filters to limit data displayed
- Configure grouping and aggregation as needed
- Set up visualizations based on the view data
¶ Important Notes
- The SQL statement determines which fields will be available in your view
- You can reference multiple tables in your SQL query to create more complex views
- Ensure your SQL syntax is correct before saving the view
- The view will include all fields specified in your SELECT statement