¶ Documentation: Reports in Planning
¶ Overview
This documentation provides instructions for creating and configuring reports in Planning. Reports allow you to visualize and analyze data from various data sources with flexible layouts and filtering options.
¶ Prerequisites
- Access to Planning application
- Appropriate permissions to create reports
- Understanding of your data structure and reporting requirements
¶ Accessing the Report Builder
¶ Step 1: Navigate to Reports & Forms
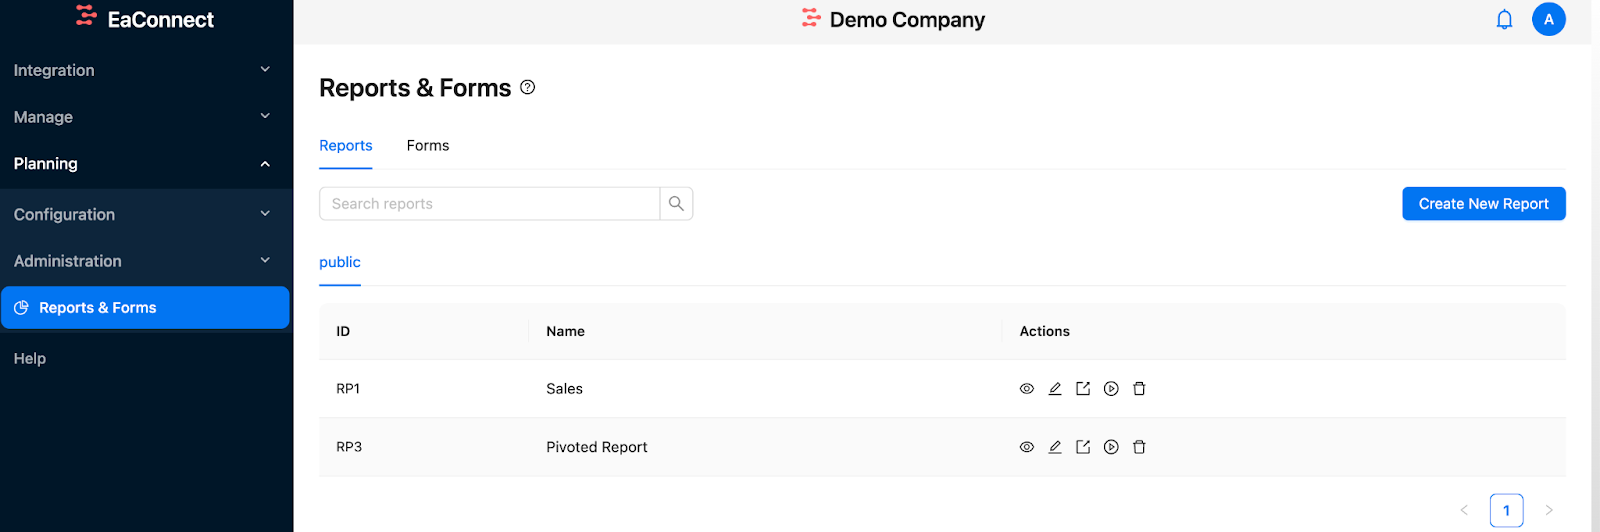
- From the main navigation menu in Planning, click on "Reports & Forms"
- You will see tabs for "Reports" and "Forms" - select the "Reports" tab
- Existing reports will be displayed with their ID and Name
- Click the "Create New Report" button in the upper-right corner to open the Report Builder
¶ Creating a New Report
¶ Step 1: Basic Report Configuration
- Report Name: Enter a descriptive name for your report
- Select Team: Choose a team from the dropdown menu
- The report will be accessible only to users who are members of this team
- You'll only see teams for which you have admin privileges
- By default, the public team will be selected
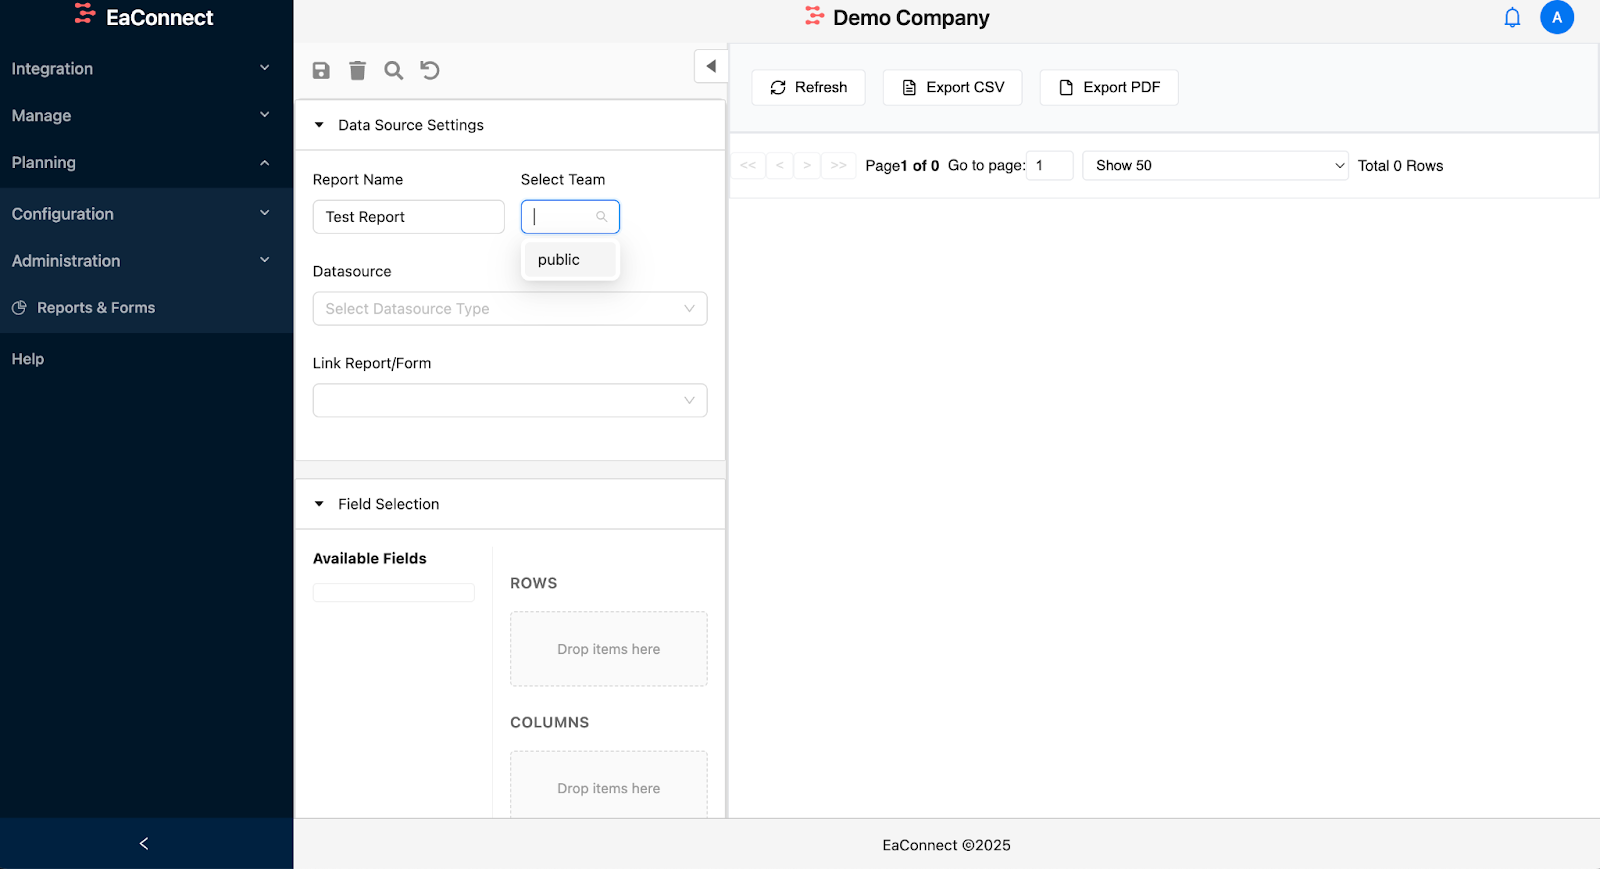
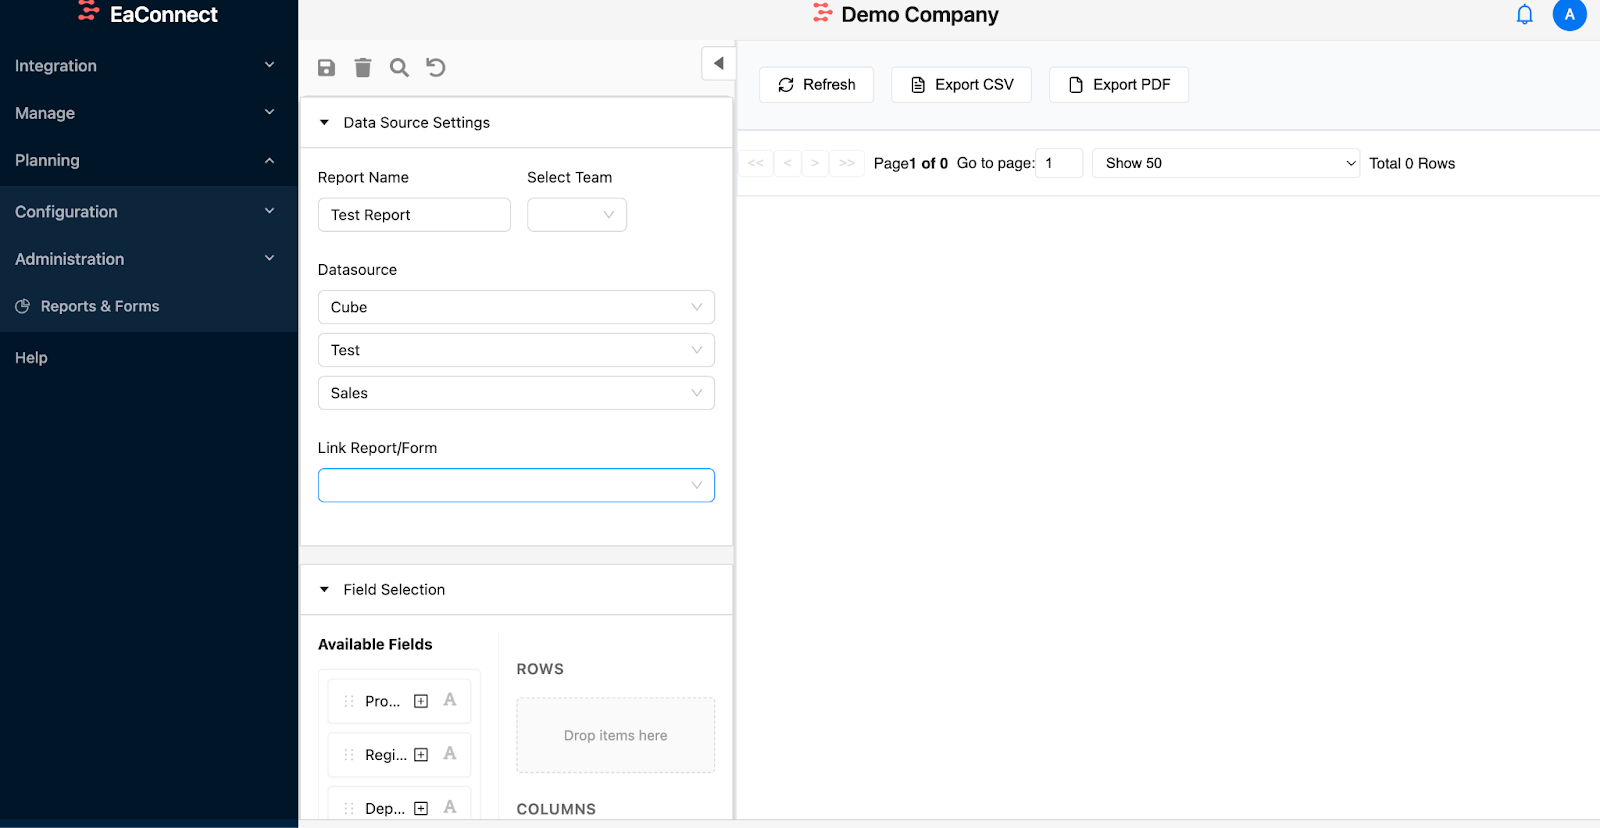
¶ Step 2: Configure Data Source Settings
- Data Source Type: Select the type of data source you want to use
- Options include: Cube, Table, Dimension, View, etc.
- Select Model: Choose the model that contains your data
- Data Source: Select the specific table or view from which to build your report
- Link Report/Form (Optional): Link to other reports or forms for navigation
- This enables users to navigate to related reports or forms from the current report
- For detailed configuration, refer to the separate "Link Report & Form" documentation
¶ Step 3: Design Report Layout
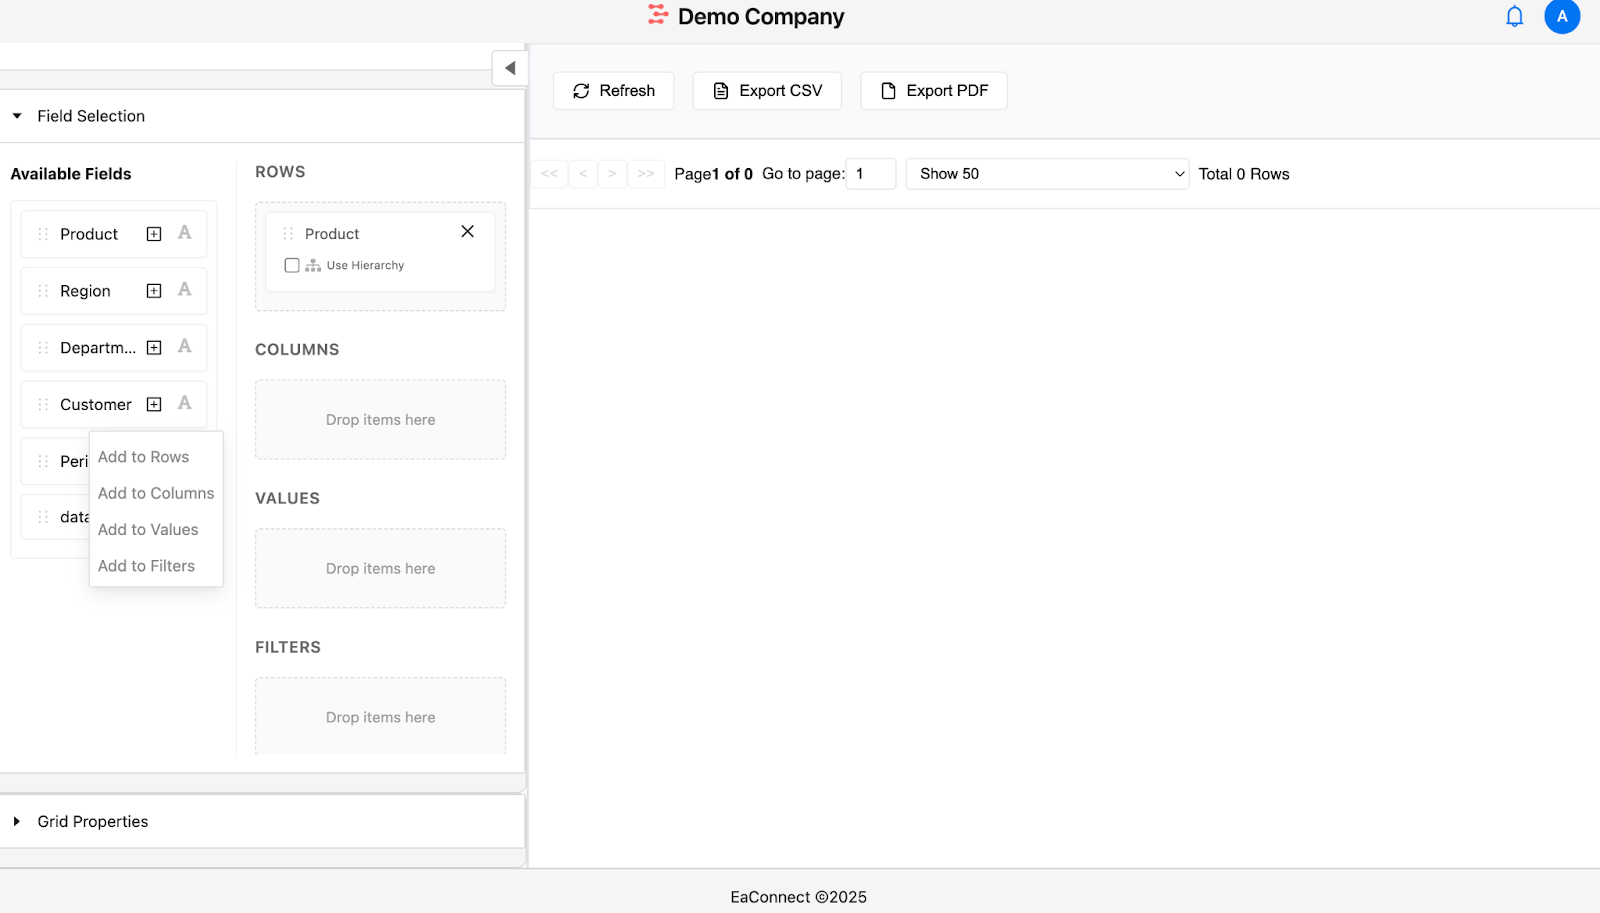
Available Fields: After selecting your data source, available columns will appear in the "Available Fields" section
You can organize these fields into different areas of your report:
- Rows: Fields that will be displayed as rows in your report
- Columns: Fields that will be displayed as columns
- Values: Measures or values that will be calculated and displayed
- Filters: Fields that will be used for filtering the report data
To add fields to these areas:
- Drag and drop fields from "Available Fields" to the desired area
- Right-click on a field and select which area to move it to
¶ Step 4: Configure Dimension Hierarchies (Optional)
- For dimension columns, you can enable the "Use Hierarchy" option
- When enabled, this allows users to view the report with hierarchical drilling capabilities
- Select the specific hierarchy to use for the dimension
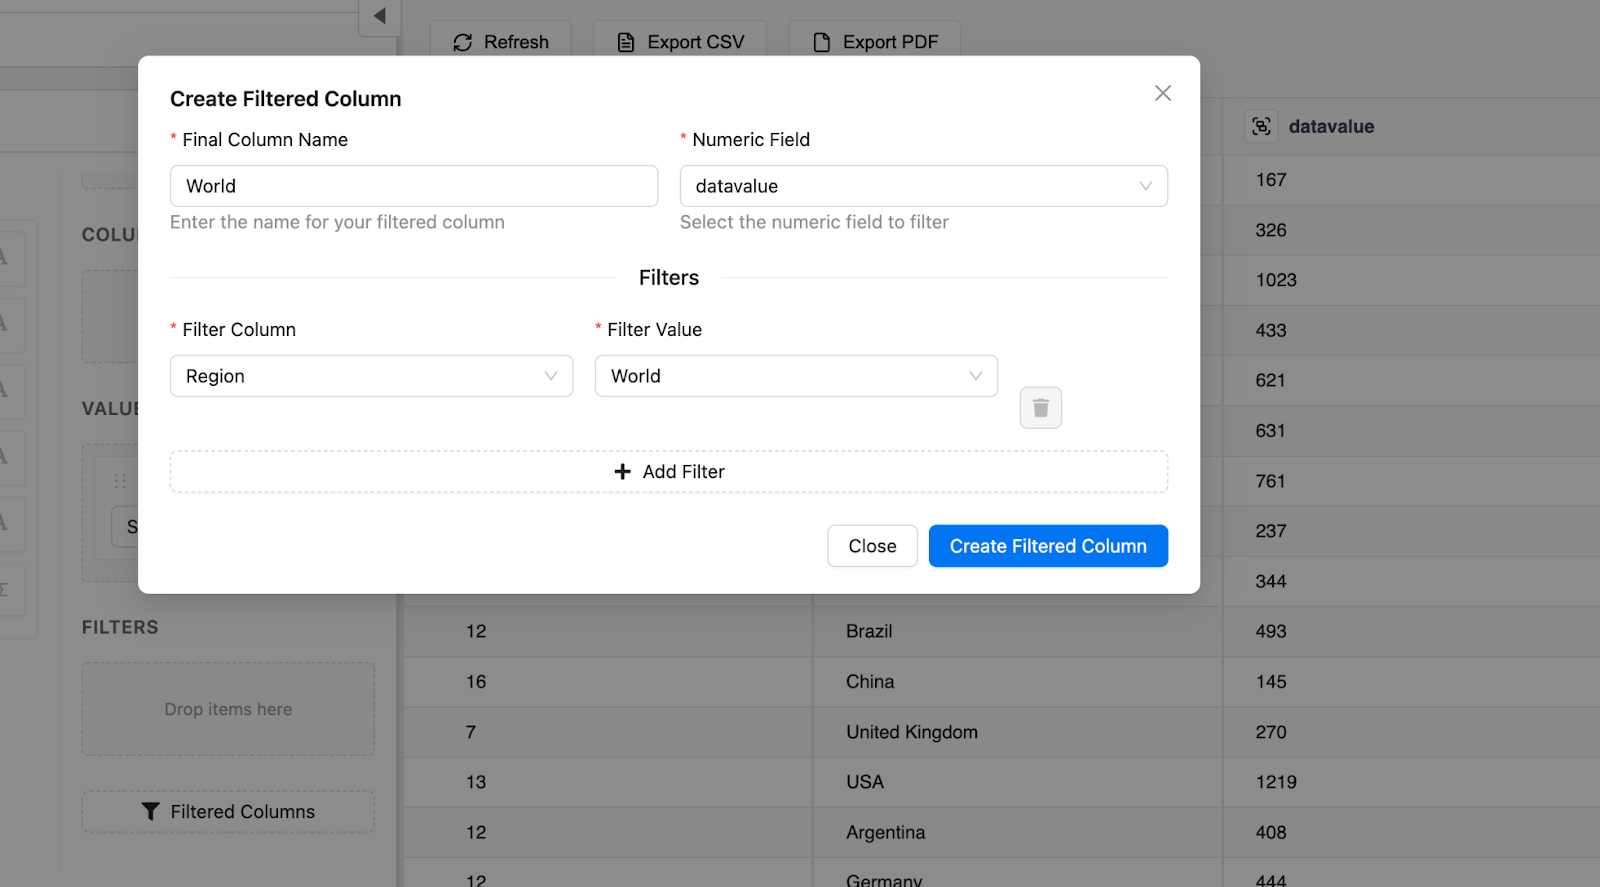
¶ Step 5: Create Filtered Columns (Optional)
- Click on "Filtered Columns" to create calculated or filtered columns
- In the "Create Filtered Column" dialog:
- Enter a name for your filtered column
- Select the numeric field to filter
- Choose the filter column and filter value
- Add multiple filters if needed
- Click "Create Filtered Column" to add it to your Available Fields
- The newly created filtered column can be used in your report layout
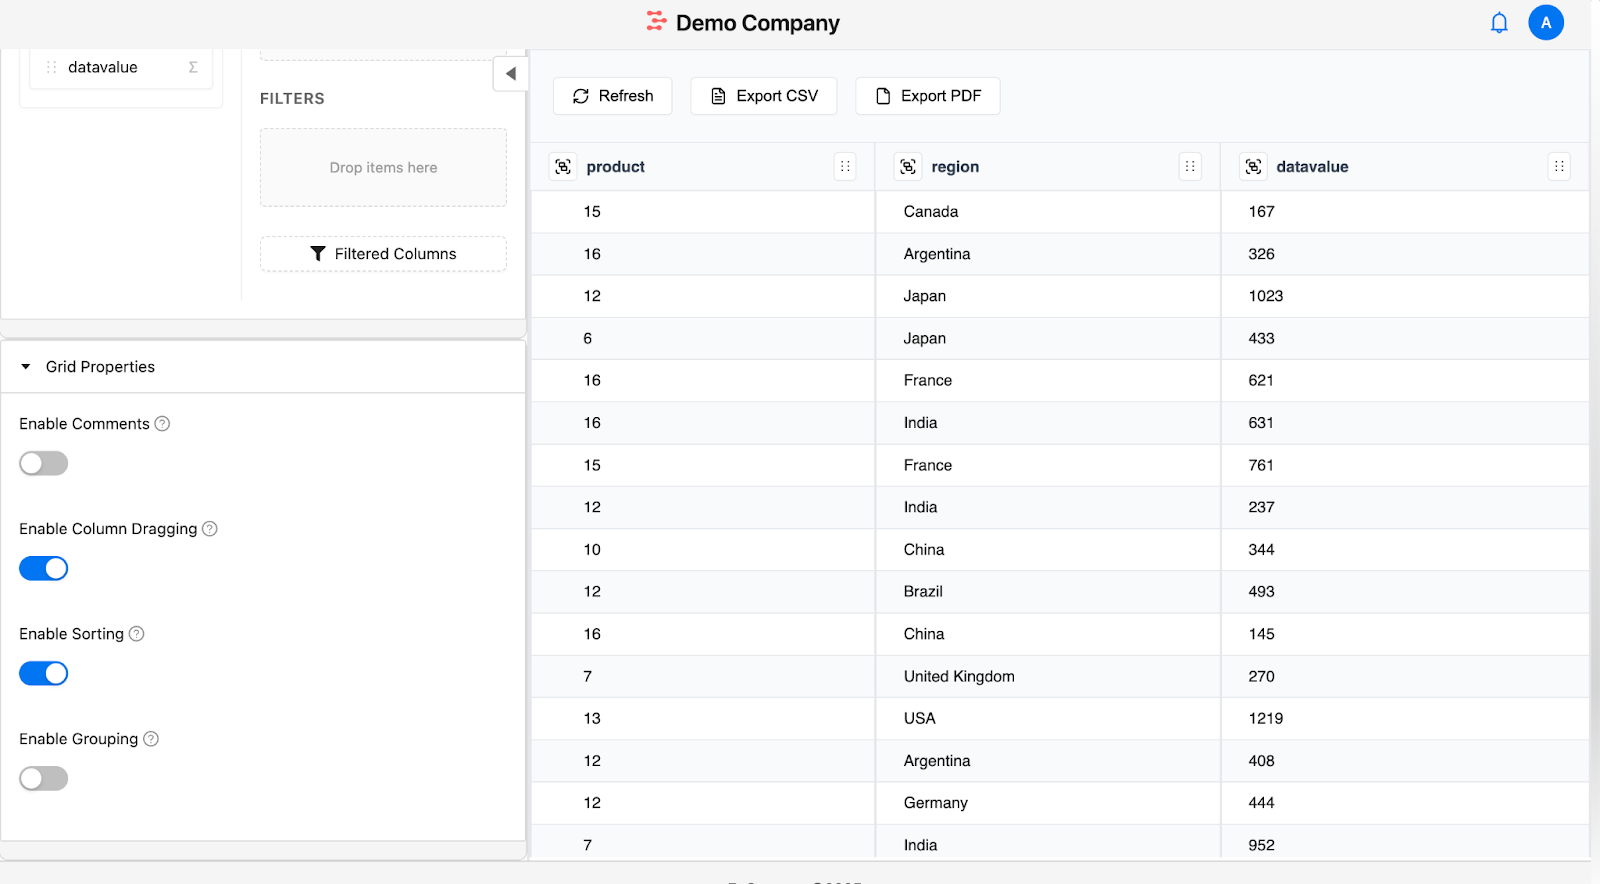
¶ Step 6: Configure Grid Properties
Access the "Grid Properties" section to enable various report features:
- Enable Comments: Allow users to add comments at the row level
- Comments will be visible to all users with access to the report
- Enable Column Dragging: Allow users to rearrange columns
- Enable Sorting: Allow users to sort the report by different columns
- Enable Grouping: Allow users to group data by specific criteria
¶ Step 7: Save and Use Your Report
- Once you've configured your report, click "Save" Icon (upper-left corner) to create the report
- The report will now be available in the Reports list
- Users within the selected team can access and view the report
- Export options allow users to download the report in CSV or PDF format
¶ Additional Features
- Refresh: Update the report with the latest data
- Export CSV/PDF: Download the report in your preferred format
- Pagination: Navigate through pages of large reports
- Show Records: Control how many records are displayed per page
¶ Managing Existing Reports
Once a report is created, you can manage it directly from the Reports tab in the Reports & Forms section:
¶ Report Actions
In the Reports list, each report row includes an Action column with icons for:
View Report ![View Icon]: Click to open and view the report
Edit Report ![Edit Icon]: Click to open the report in the Report Builder and make changes
Delete Report ![Delete Icon]: Click to remove the report (confirmation required)
Create View ![Create View Icon]: This allows you to build customized views using the same data and layout settings.