¶ Documentation: Component Tables in Planning
¶ Overview
This documentation provides instructions for creating, managing, and utilizing component tables in the Planning application. Component tables serve as essential data structures that can be created manually or imported via CSV, and later used as data sources for reports and forms.
¶ Prerequisites
- Access to Planning application
- Appropriate permissions to create component tables
¶ Creating a Component Table
¶ Step 1: Select a Model
Before creating a component table, select the appropriate model from the dropdown menu where you want the table to be created.
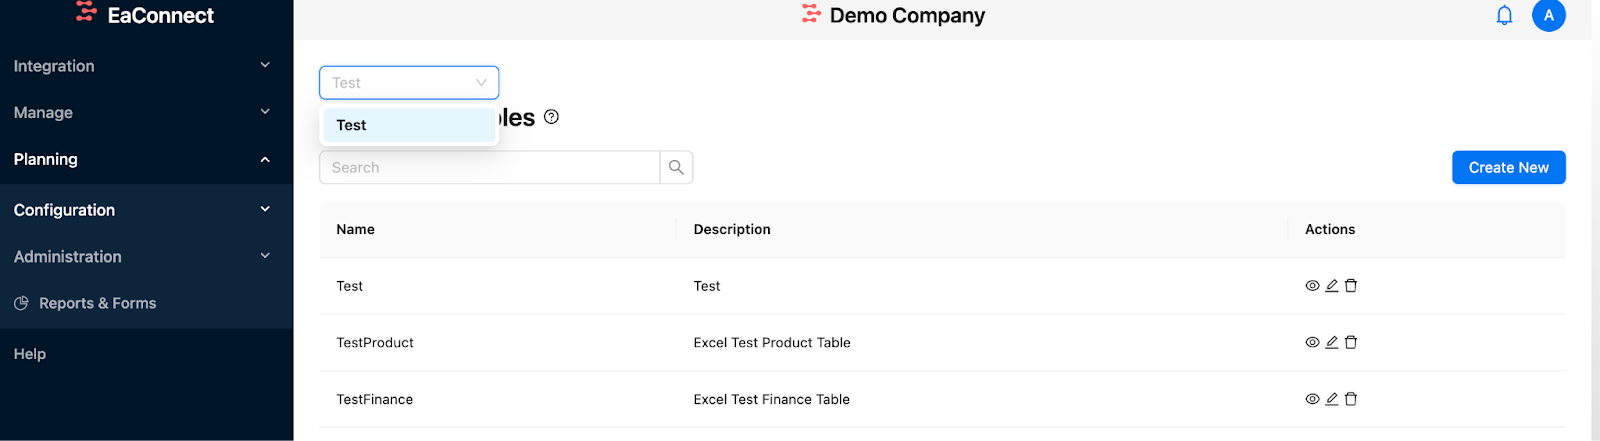
¶ Step 2: Click "Create New" Button
After selecting the model, click on the "Create New" button to begin the component table creation process.
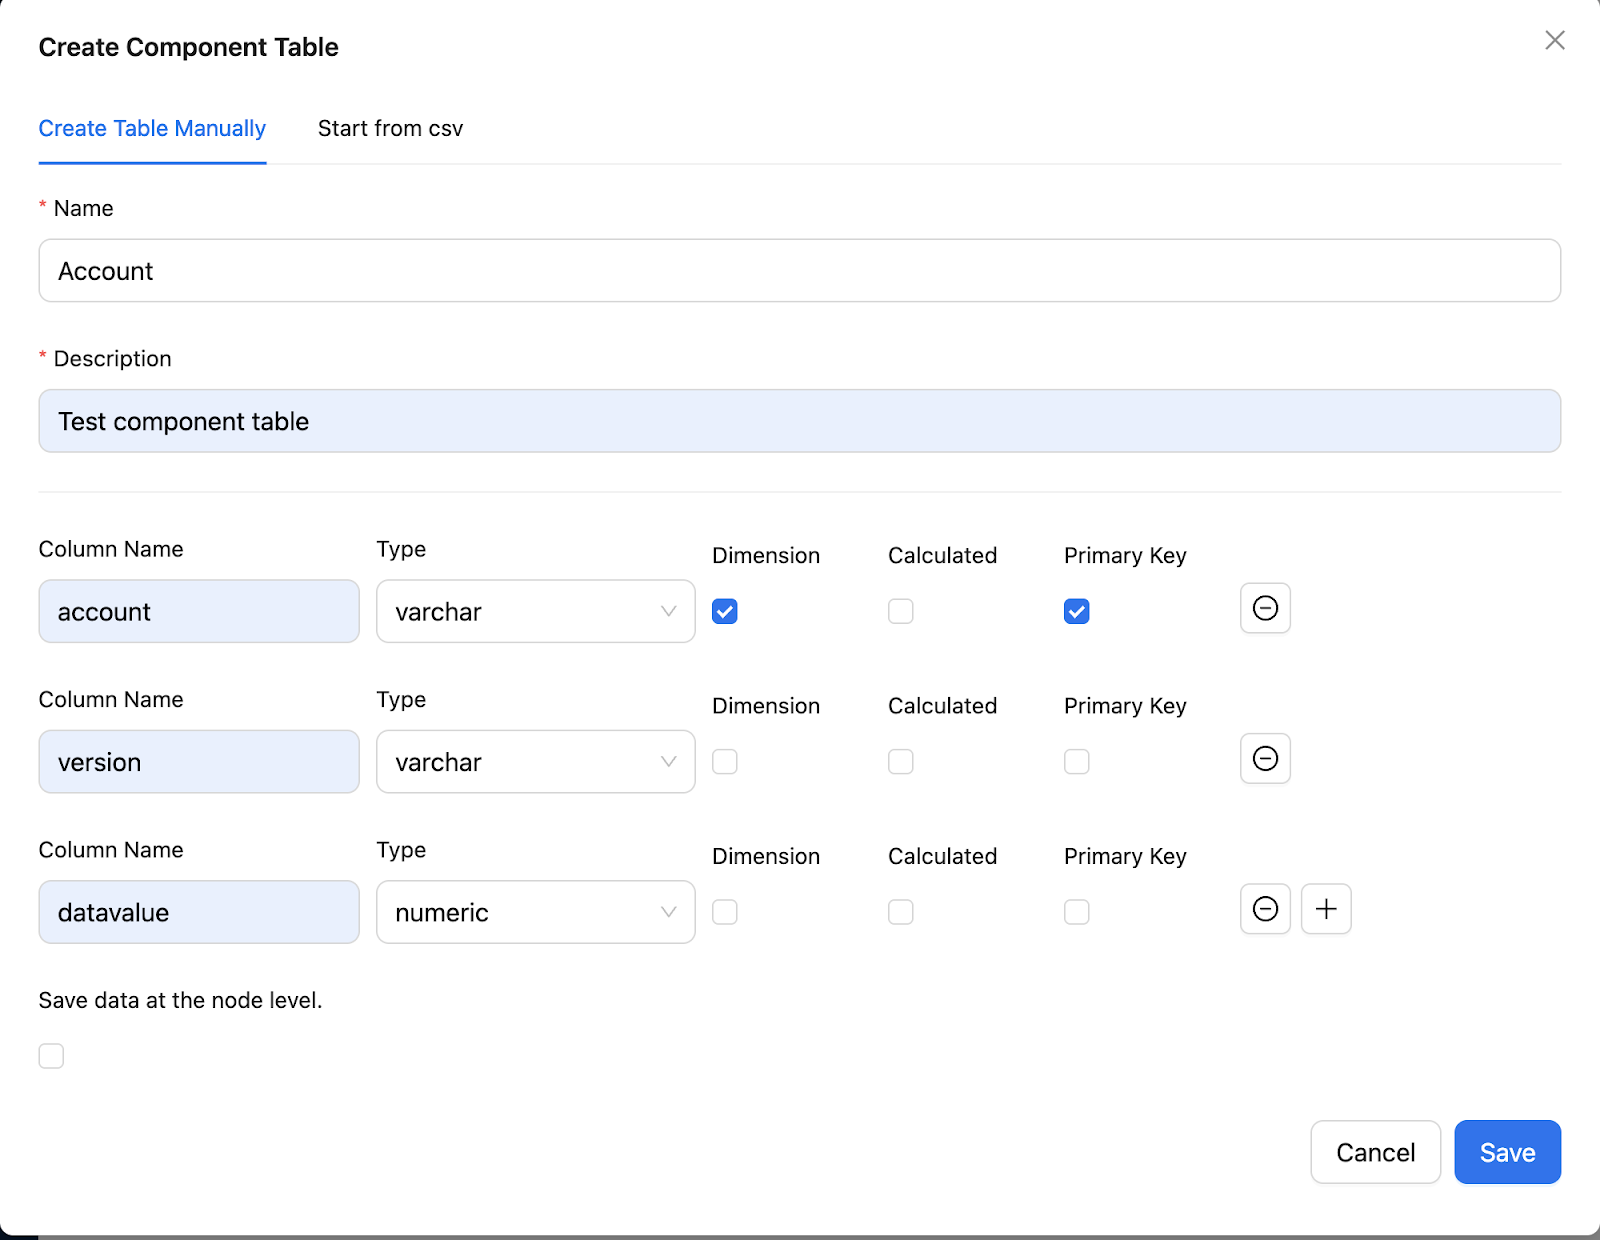
¶ Method 1: Manual Creation
- Enter the required information for your component table
- Define the schema by adding columns one by one.
- For each column, specify:
- Column name
- Data type
- Primary Key (check this box for columns that should serve as primary keys)
- Dimension (check this box to link the column with an existing dimension)
- Note: The dimension must already exist in Planning before linking
¶ Method 2: CSV Upload
- Prepare a CSV file with your data
- Upload the CSV file
- The system will automatically detect the schema based on your CSV
- You can then:
- Rename columns if needed
- Modify detected data types
- Set Primary Key (check this box for columns that should serve as primary keys)
- Link with Dimensions (check the dimension box to link a column with an existing dimension)
- Note: The dimension must already exist in EAConnect before linking
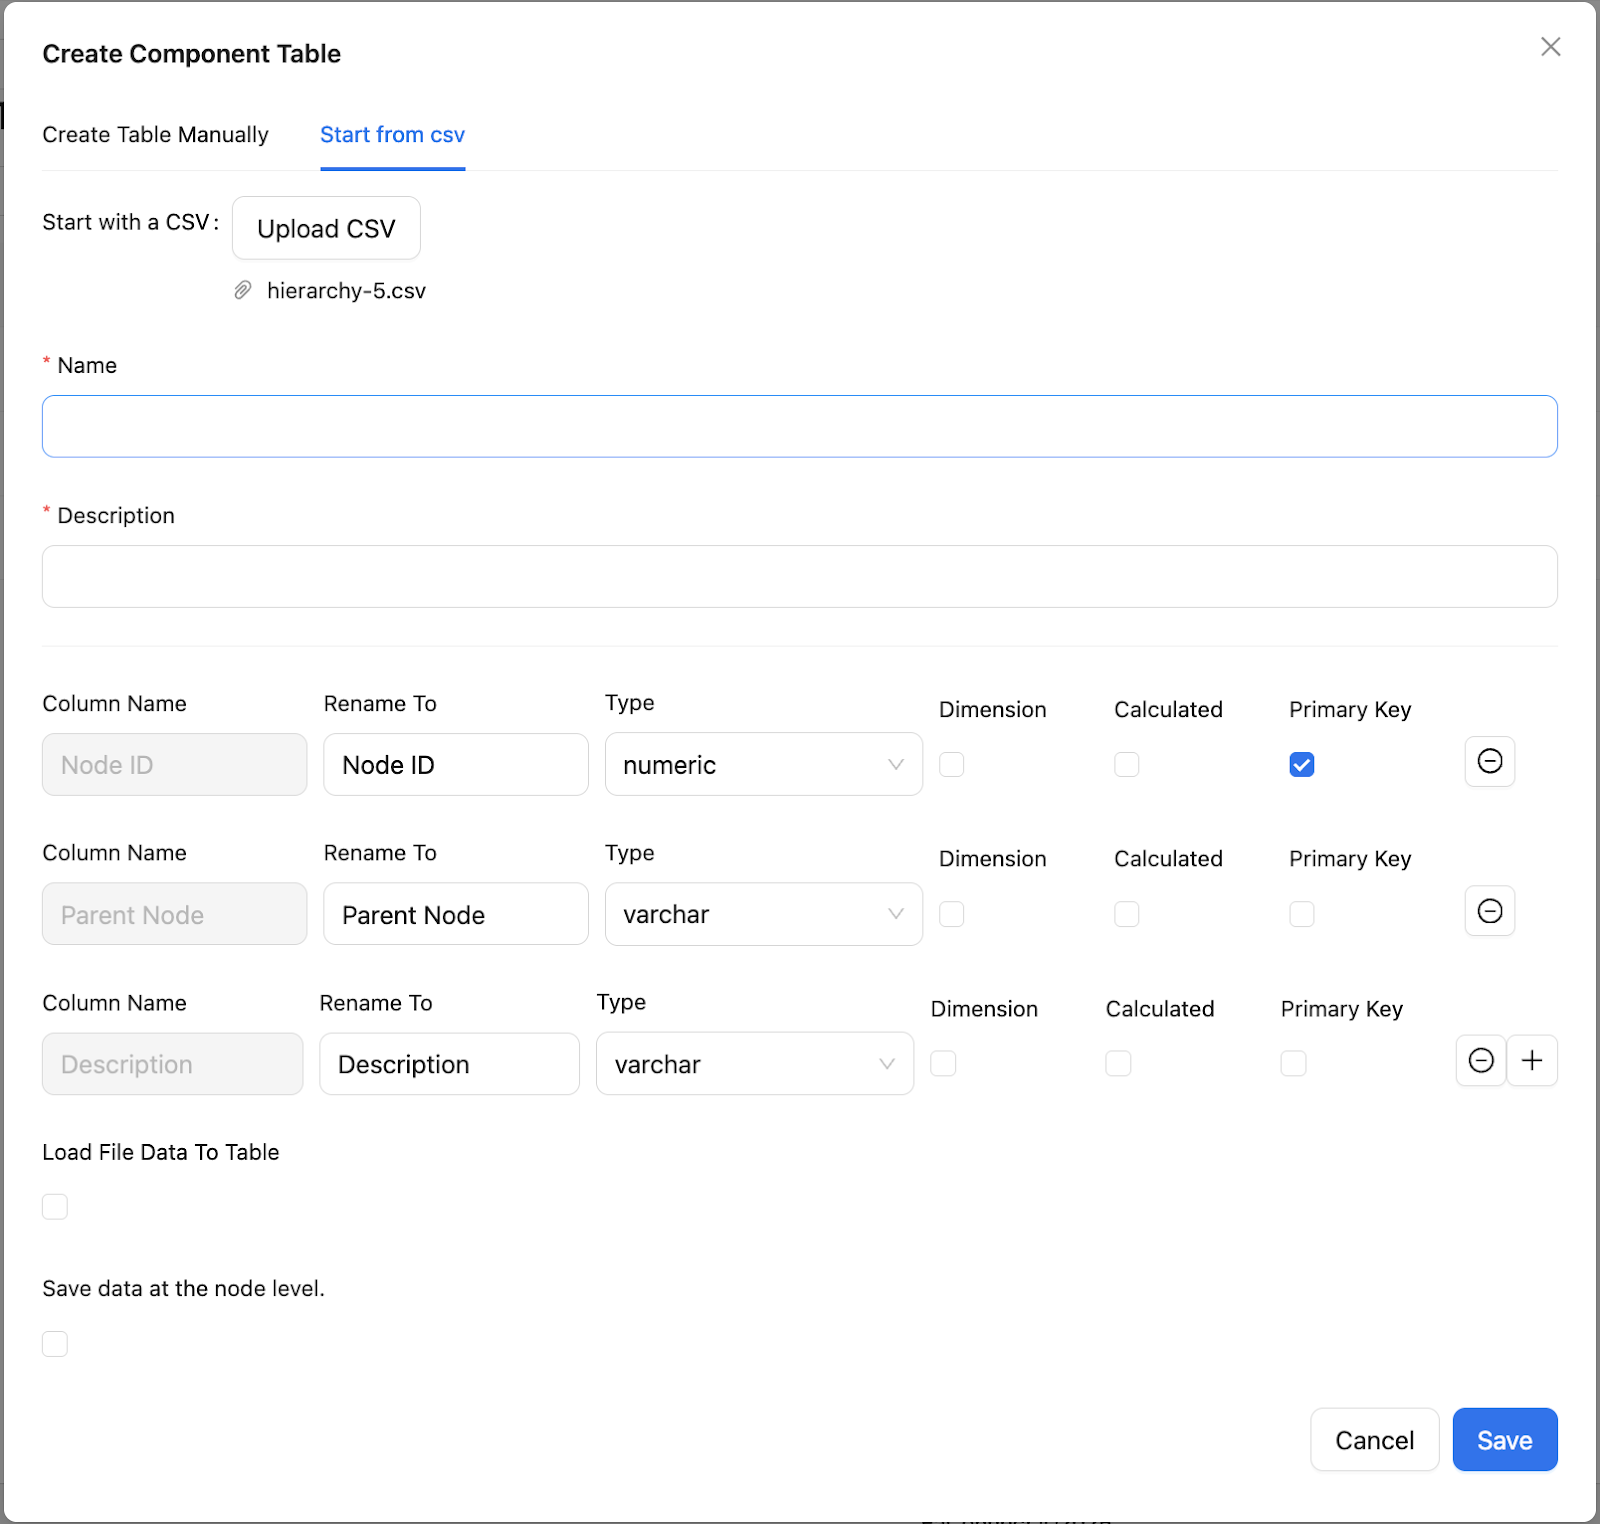
¶ Additional Options
- Load Data at Node Level: When enabled, this option allows you to save the data at the node level during the creation process
- This setting affects how data is stored and accessed within the system
¶ Step 3: Save and Create
After configuring your component table, click the appropriate button to save and create your new component table in the selected model.
¶ Managing Component Tables
¶ Editing Component Tables
- Navigate to the Component Tables screen in your selected model
- Locate the component table you wish to edit in the list
- Click on the edit icon (pencil symbol) in the action column
- In edit mode, you can:
- Modify the table schema by adding or altering columns
- Change column properties (data type, primary key status, dimension links)
- Update table description or other metadata
- Save your changes to apply the modifications
¶ Deleting Component Tables
- Navigate to the Component Tables screen
- Find the component table you want to remove
- Click on the delete icon (trash can symbol) in the action column
- Confirm the deletion when prompted
- Note: Deleting a component table will permanently remove the table and its data
- Any reports or forms using this table as a data source will be affected
¶ Using Component Tables in Reports and Forms
¶ Integrating Component Tables as Data Sources
- Navigate to the Report/Form Builder section
- Create a new report or form, or edit an existing one
- In the data source configuration section:
- Select "Component Table" as the data source type
- Choose the desired component table from the dropdown list
- The system will load the schema of your selected component table
- You can now:
- Select columns to include in your report/form
- Apply filters to limit data displayed
- Configure grouping and aggregation as needed
- Set up visualizations based on the component table data