EA Connect - Passkey Integration
This document provides an overview of how to use Passkey for authentication within your application. The integration allows users to create, manage, and use passkeys for secure login across multiple devices.
¶ Prerequisites
Before using Passkey authentication, ensure the following prerequisites are met:
- User Profile Access: You must have access to your user profile within the EA Connect.
- Compatible Device: A mobile or tablet device with camera access for scanning QR codes.
- Account Information: Ensure you know the account ID with which you wish to register the passkey.
¶ Step 1: Create a Passkey
The first step, "Create a Passkey," allows users to generate a secure passkey for authentication. Follow these steps to create your passkey:
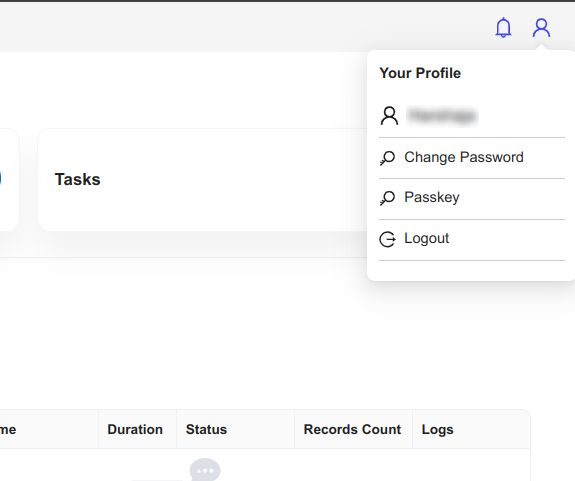
- Navigate to User Profile: In the web application, go to your user profile by clicking on your username or profile picture.
- Select Passkey: In your profile, click on the "Passkey" option to open the passkey management page.
3. Create New Passkey:
- Click on the "Create Passkey" button.
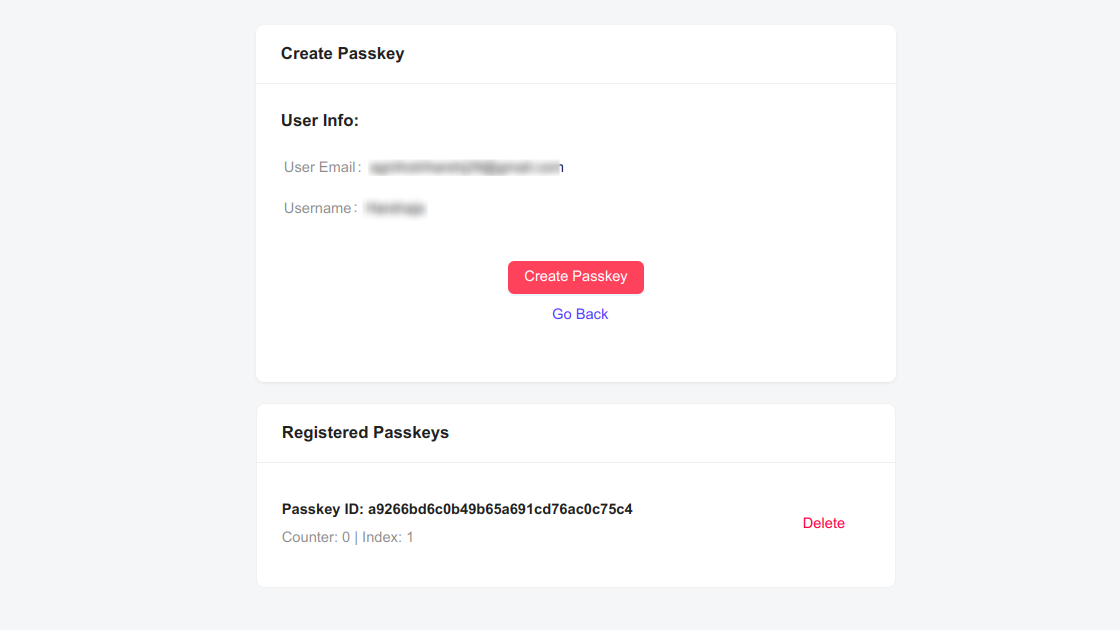
- A new page will appear with a QR code.
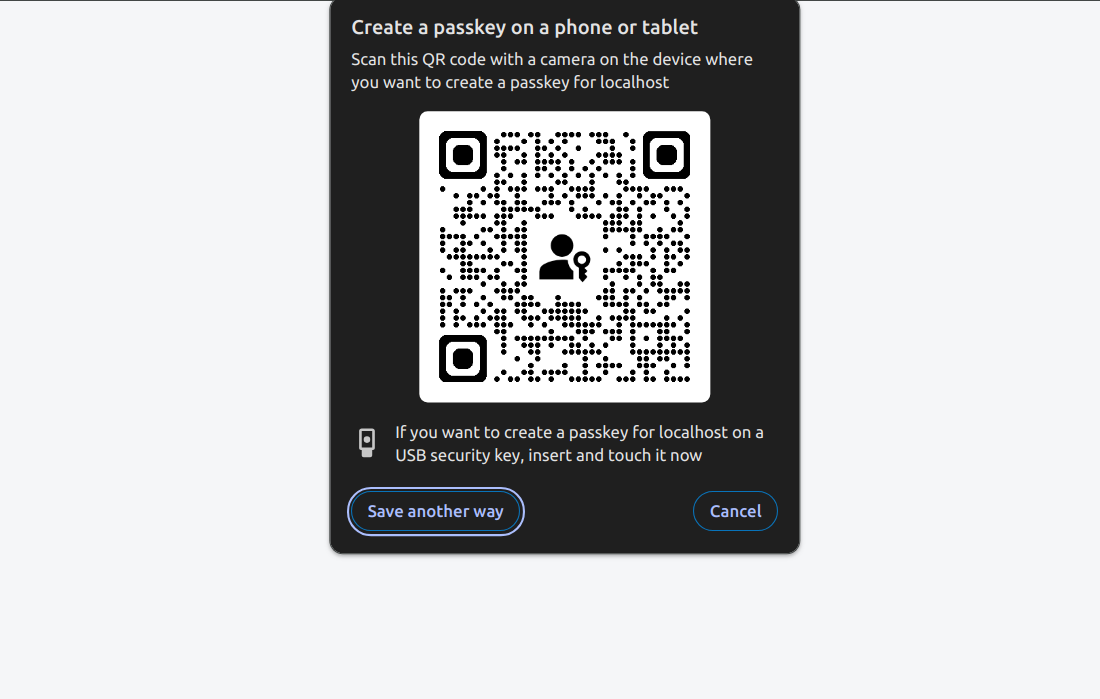
4. Connect Your Device:
- Use your mobile or tablet device to scan the displayed QR code.
- Follow the instructions on your device to register the passkey to your account.
Important: If a passkey with the same ID is already registered to the account, the new passkey will overwrite the old one. Be mindful when creating a new passkey, as this action is irreversible.
¶ Step 2: Manage Passkeys
Users can store a maximum of three passkeys at any given time. Passkeys are indexed from 1 (the oldest) to 3 (the latest). It's essential to note this limitation:
Overwrite Existing Passkeys: As stated earlier, If you try to register a new passkey on a mobile or tablet device and a passkey with the same ID is already registered to the same account, the new passkey will overwrite the existing one. Make sure you know which passkey you are replacing.
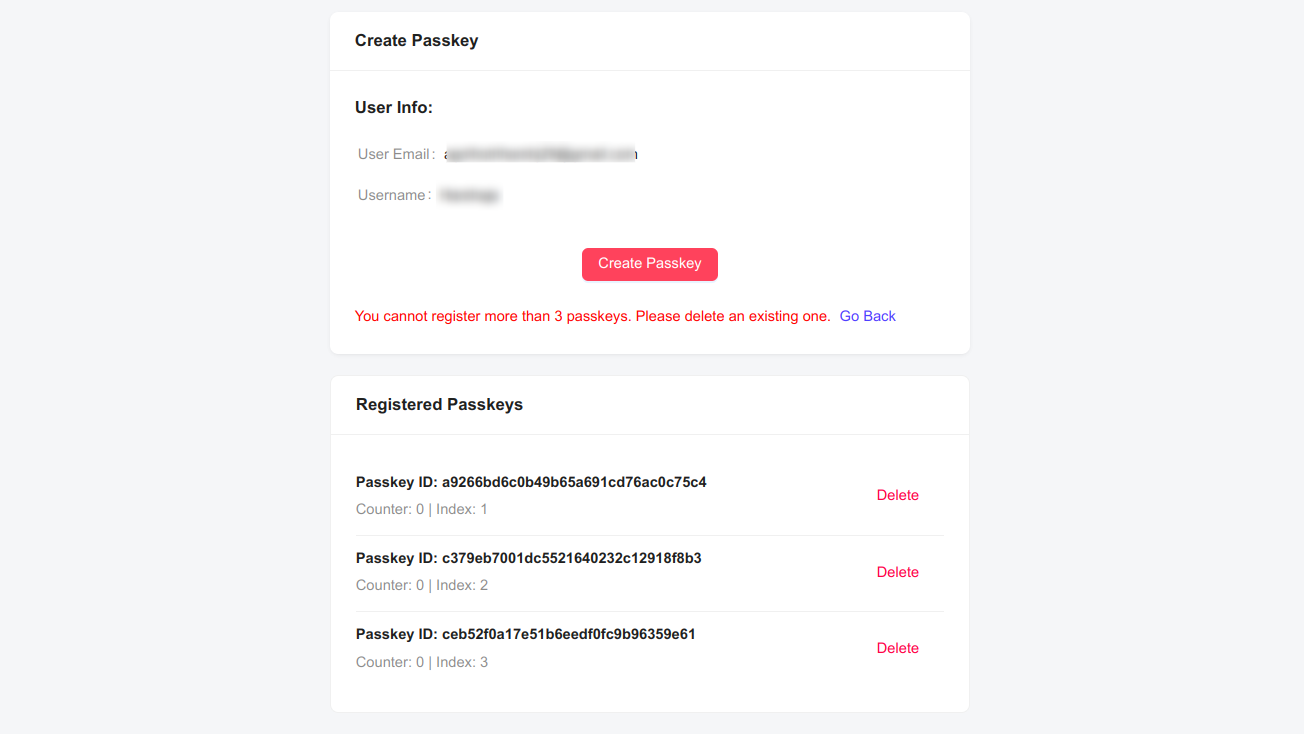
Delete a Passkey: If you need to remove a Passkey, click the "Delete" button next to the Passkey's ID on the same page. This action is helpful if you've reached the maximum limit of three passkeys.
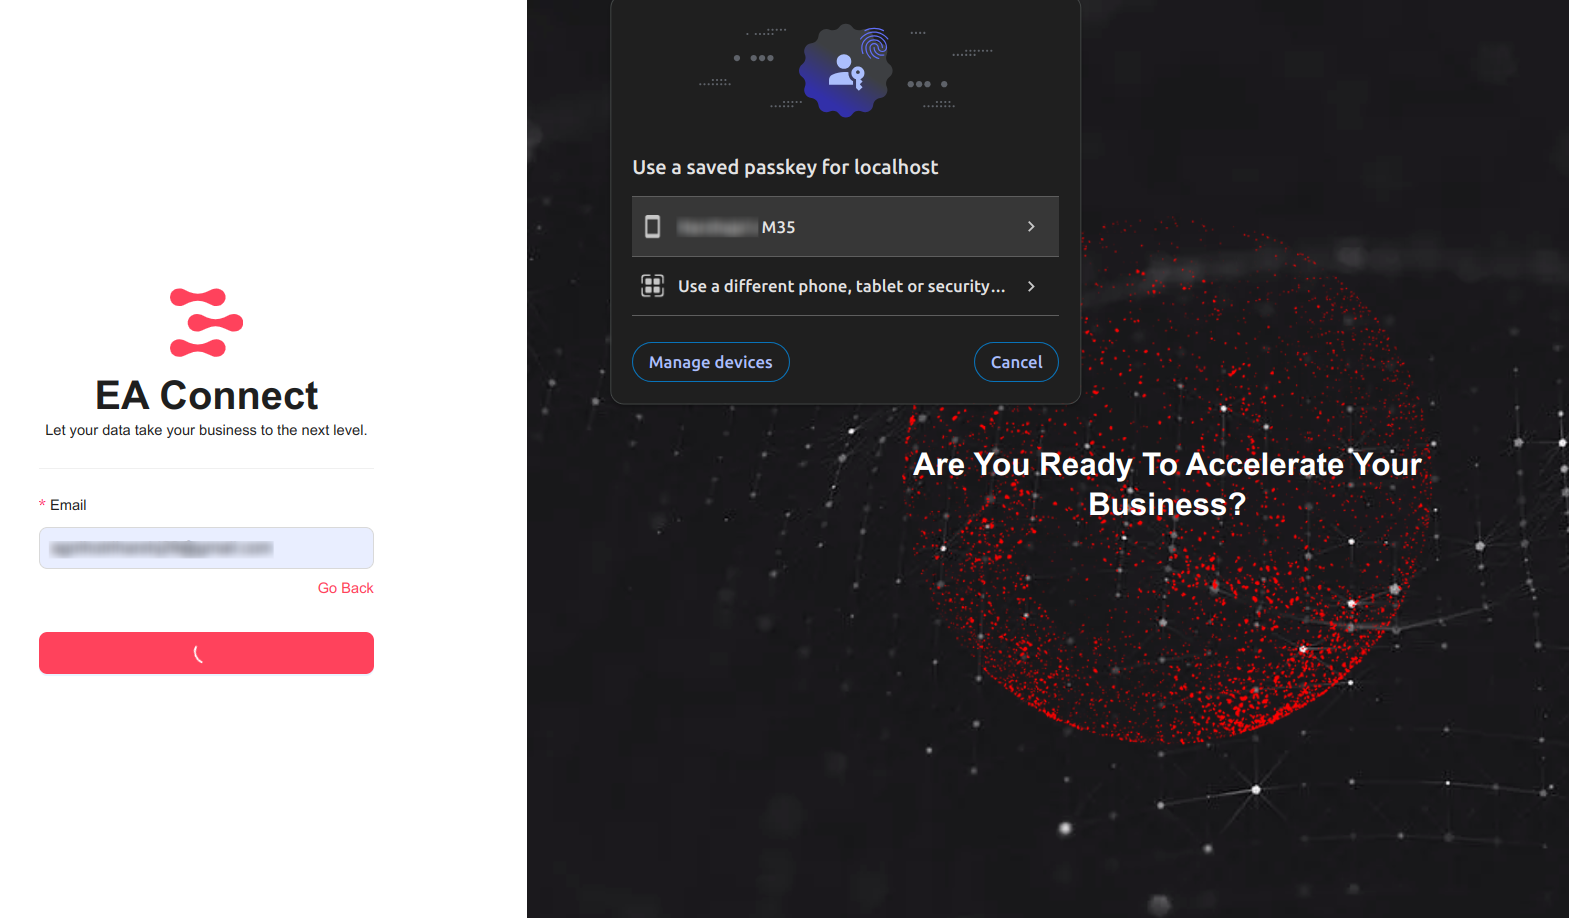
¶ Step 3: Login Using Passkey
To log in using your registered passkey, follow these steps:
1. Navigate to the Login Page: Go to the application's login page.
2. Select Login with Passkey:
- Click on the "Login with Passkey" option.
Enter Your Email ID: Input your email ID associated with the passkey.
Complete Login:
- Click on the "Login" button.
- A popup will appear prompting you to select the device you wish to use for verification.
- Once you select your device, a message will be sent to the chosen device asking for verification.
- Verify the login on your device to complete the authentication process and access the application.
By following these steps, you can effectively use Passkey for secure and convenient authentication across multiple devices. Remember to manage your passkeys carefully, considering the overwrite and maximum limit policies.